Before moving on to the next step of this tutorial, which is to draw the standard T-nuts and bolts, we can find it in the future command manager below, which is called the wizard. Once we have located it, we can then move on to the next step of this tutorial. After we have located it, we will be able to proceed to the next stage of the process. The connection that exists between these two lines is outlined in the following description:In addition, between these two lines 18, leave the sketch at this point. After that, move the boss or base note forward by 29 millimeters. After that, extend the contour by a distance of 29 millimeters. The T-contour that we currently have can be seen in this image. The top sketch will have a hole drilled in it, and then another hole will be drilled in the middle of the T-nut.
In order to pinpoint the precise springs of the center of this hole, I will now determine the relationship that exists between this point and this point, which is vertical. This will allow me to locate the exact center of the hole. If the component, when viewed from above, is not vertical, and if there is no connection between this point and the line that runs between this point, then the size of this point has not been increased appropriately. In addition to that, there needs to be some sort of link between this point and the line that is situated between this point. Its diameter should be 10.9 millimeters at the very most. Exit the sketch, use extrusion cutting in the future, use this sketch and extrude the hole right now, I will use the command to chamfer, and select this edge to change this dimension to 0 right now. Extrusion cutting will be used. Cutting done by extrusion
 How to make your work easier- UNISTRUT spring nuthttps://www.youtube.com/watch?v=LgbtHu6hLqc
5Before clicking OK and clicking Sure, we have the option of adding the beginning of the tread as the beginning of the tread. This option is available before clicking OK. Before clicking either button, this can be done whenever it's convenient for you. Because we want to create the tread on the inside of the cylinder, I will select this point, china nuts manufacturer which is marked with an m12, and we will make use of the thread cutting magic tap that we have chosen to go with. This will be done because we want to create the tread. Simply clicking the OK button will put you right in the middle of our ambush. Maintaining secrecy regarding the sketch is not an impossible task. The initial note that was written down is going to be kept in the file as a result of the fact that I have assisted other individuals. Open the document that is being shared once you have finished clicking the OK button, and then begin drawing a diagram. It would be helpful if you could draw a circle in the shape of a cylinder with a diameter of 12 millimeters, then another 100 millimeters after that. I would like to offer my sincere apologies for any inconvenience this may cause.
You are required to click the OK button before you can even begin to draw the line that will outline the cylinder. On the front sketch, we are going to draw a polygon that needs to have a total of six sides so that it can have a width of ninety millimeters. This width will be indicated in millimeters.
The next step that you are going to need to take is to abandon the sketch and then draw eight millimeters into the future. To begin drawing a circle on this plane that is perpendicular to the direction that the light is coming from and on the inverse side of the coke limit cutting, simply press the OK button. This will allow you to begin drawing the circle on the inverse side of the coke limit cutting. This will get you off to a good start. If you see that clicking this arrow changes the side draft to 50 mm, then you need to click the OK button, and I will do the same thing for this website. If you do not see this change, then you do not need to take any action. I am going to proceed in the same manner with regard to this website. To complete the Lipsyte arrow, first you will need to draw a circle tangent, nuts manufacturer then you will need to squeeze and cut it, and finally you will need to set the side draft angle to 15 degrees. Okay, we'll use this as our slanderous statement, thanks for clearing that up.
At this juncture, we are required to carry on direct commercial activity with one another, and I will carry on commercial activity once more. We will have the opportunity to locate the annotation manager hole guide in the not too distant future. After selecting this circle over here, the next thing I'll do is threaten the 70-inch monitor in order to generate the offset of 35 millimeters. This is the next step. We will need to change the type of the turret so that it is a metric mold because the tread is located outside of the cylinder. Due to the fact that the tread is situated external to the cylinder, this will be essential. We are going to give it a cutting rate of 12.1.25 one more time, and when we are finished, we are going to click OK to confirm the adjustment.
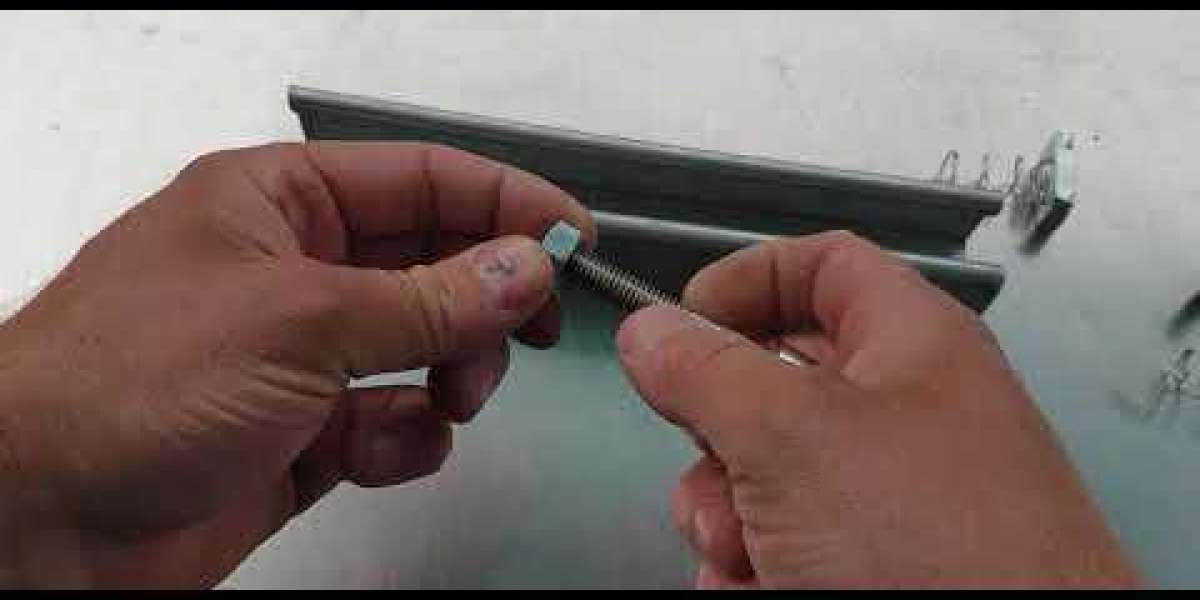
This is a Boult file, which is the format in which the initial version of our bolt file was saved. Simply click the Save button once and then the file will be saved. Now that we have both of these parts in our possession, we are going to create a file that will be archived from these two parts and will be assembled from these two parts. This will take place once we have both of these parts. When it comes to the product's assembly, this component will be the first thing put together. However, in this location, I will only add a relationship or pairing because that is where the Boult and the TT component are located. In this location. This face, which is one of eight honeycomb screws, will be the one I choose to represent the organization as its emblem. The peanut can be found over here, and the school can be found over here. Both of them can be found here. In addition to that, I'd like to call your attention to another similarity that exists between the faces of these two different people.